Tips For Photographing Caves
Need some tips for photographing caves?
Photographing caves can be challenging and rewarding. Here are some tips from a few crazy cave photographers. (Me and David).
#1 Obey the basic caving rules.
Bring the following from the Deschutes National Forest Info on Oregon Caves
.
*A conservation ethic
*Three sources of light and extra batteries
*A friend or two. Do not cave alone. (They also serve well as VALS…..voice activated lights.)
*Knowledge of your personal limits
*Water and food
*Caving helmet, long pants, sturdy boots and gloves
*Layered clothing: cave temperatures are 33 to 50 degrees
*As little gear as possible but enough to still be safe (and still take great photos.)
*Non-glass containers to pack out food and body waste.
Now for the nitty-gritty tips for photographing caves form me.
You'll need a tripod, shutter release, spare batteries and a flashlight (in fact 3 if you read the previous section!) it’s DARK in there and your exposures will take a long time.
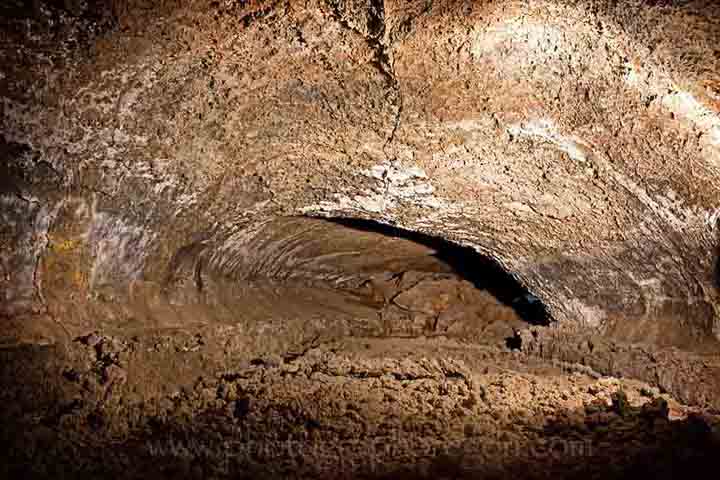
Cave photography is a lot of trial and error. There is a lot of similarity with night star photography.
Light is iffy and/or non-existent. Likely you will be in caves open to the public and if not……don’t tell me. (email me privately with directions!)
Anyway, people wander in and out past you with various light sources, so you have to be patient.
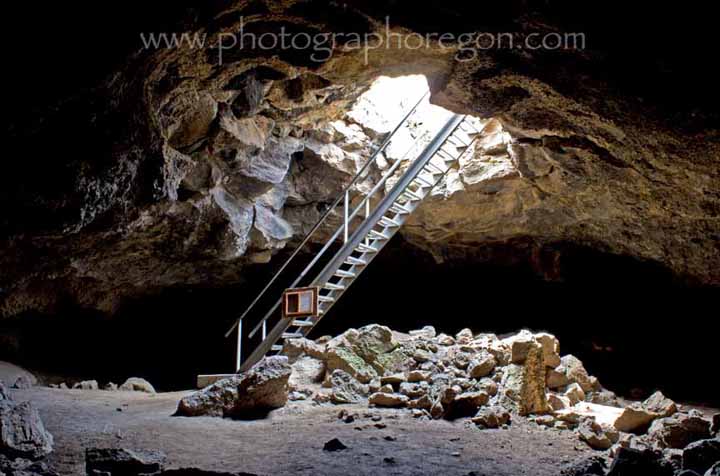
Since you didn’t go alone, right???(#1 Tip for photographing caves....Don't go alone!) you might be able to have your people practice a little traffic control if needed. This won’t work in the Lava River Cave as it is a commercial cave. (However, they can be very accommodating if you are nice.)
There is some practice involved getting the effects you want when light painting, so one of my top tips for photographing caves, make sure you go with plenty of time.
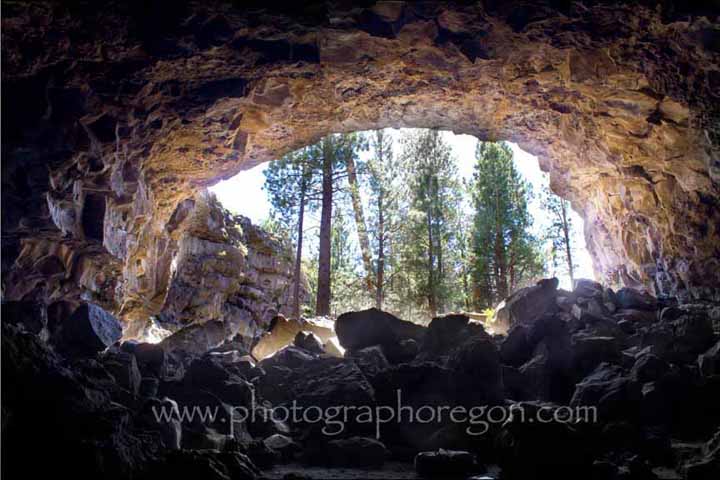
Bracketing is also a good thing to get in to the habit of doing if you're shooting from inside the dark cave out the mouth into the sun. This image looking out from the Hidden Forest Cave, is a stacked image so you can see the trees and keep some texture on the rocks.
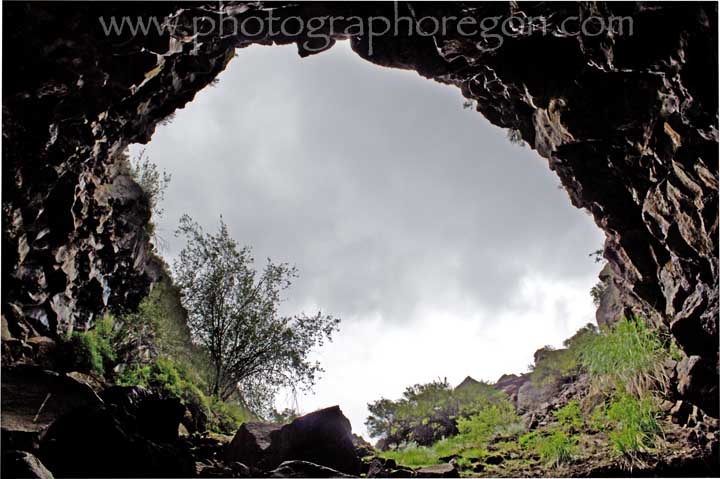
This image, looking out from Arnold Ice Cave, would have had the clouds completely blown out, or the cave interior black, if not for several stacks of exposure.
David's Tips For Photographing Caves
Above are my tips. Since David Johnson does a lot more extensive cave shooting I begged him for his tips. He’s kind, so here is his list of tips for photographing caves!
"Take plenty of lights (LED’s are great for guidance, but incandescent flashlights give better coloring for light painting. They’re also not as “hot”, so you get better control over lighting).
Have water along. You often don’t think about how dehydrating a cave can be due to the cool temperatures even in summer.
Wear shoes that offer some flexibility in your ankle to allow for greater traction. However, know the limits of what your body can handle. I have strong ankles and prefer the flexibility of flip-flops with a good tread for traction, although not everyone is cut out for walking through lava barefooted." (David wears flip-flops in the snow and pretty much everywhere but church with his suit.)
"Some people prefer to use a walking-stick or two. I find they get in the way, and the rocks are ever-present if you start to slip and need a handhold.
Find a tight-fitting “body-clinging” camera bag such as a backpack (The Lowe Pro Flipside series, for example, are ideal). This leaves your arms free from climbing over rock piles, etc. It also makes it easier for crawling on your stomach. Shoulder bags tend to drag on everything.
Bring along a lightweight, compact tripod." (Yes, mine weighs as much as a goat....It was quite a chore to lug it through.) "You will rarely need a maximum-height tripod, since most of the caves in Central Oregon are fairly small. Strap it onto the side of the camera backpack for best maneuverability. If it’s strapped onto the back of the backpack, it adds several more inches to your “height” when crawling and decreases your overall maneuverability.
When you’re ready to start shooting, DON’T!! Give the dust a chance to settle. The ground is very dry and can take several minutes for the powder to settle down. It can be hard to see with a dim flashlight, but believe me, it’s there, and it’s next to impossible to get out of your camera bag once it finds its way in.
Don’t change lenses once in the cave." (Opps…good to know). "Rather, choose which lens you want before entering the cave. Due to the tight working conditions, a fairly wide/fast lens is best. 18mm is adequate on a DX-crop sensor, but wider is always better (16-85mm, or even an ultra-wide in the range of 11-16mm or so is great).
Always use a remote, shoot on “Bulb” (B) and capture in RAW. For light painting, narrow down your aperture to F/5.6 or even f/8. This will decrease your shutter speed, giving you better control over the amount of light falling on the subject.
Don’t be afraid to walk through the frame while light-painting, just be sure the light always stays in front of you and never falls on your body while walking through the frame.
Be careful not to walk around too much while light painting. If you light every side of your “subject” (the cave walls, rock formations, whatever catches your eye), you lose the shadow depth and it makes for a static image. Shadows are your friend when photographing caves, particularly in small caves. You can use shadows to give the impression of expanse, even when there isn’t any. Don’t be afraid to use lots of negative space, even as much as three-fourths of the image.
Make sure to have the “highlights” indicator turned on, and review your histogram. Due to the lack of ambient light when reviewing your image, your eye will tell you that the exposure is blown out even if it’s not.
Avoid using special effects such as HDR (High Dynamic Range). The beauty in caves, particularly lava tubes, is their hard shadows, jagged edges and lack of vibrant color." (Hahahah…I said something different but I am talking shooting from inside to outside.)
"Most people stick to the usual “tunnel disappearing into the darkness” type of cave photography, but don’t be afraid to get creative. Some caves that aren’t in high-traffic areas contain formations that most people will never see. For example, while visiting Hawaii this last year I explored a cave high on the mountain that had lava formations finer than a human hair. The smallest touch or even a rapid change in temperature could fracture then apart. If you know you’re going to be in caves such as this, you might be better off to work with a dedicated macro lens and ringlights."
(I need to go back now!)
Great tips for photographing caves David…Thanks!
Now..David….How did you get this image? (One of my all-time favorites from Boyd Cave).
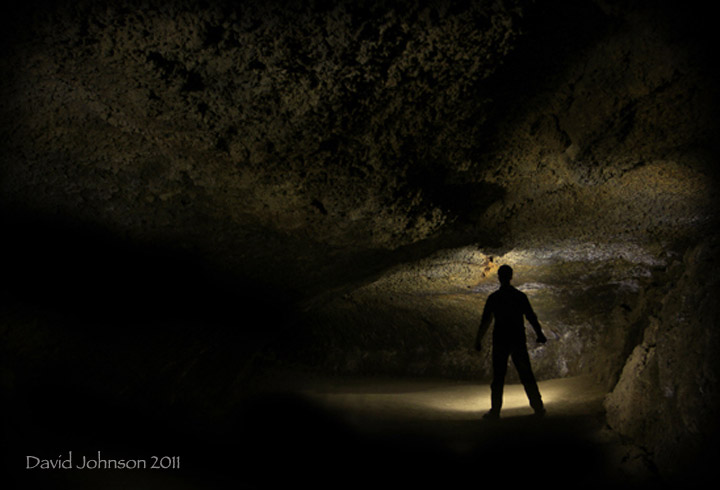
“This image was planned out before I ever took the camera out of the bag. I knew what I wanted and had already envisioned the location.
The exposure was approximately thirty seconds long, ten of which were spent “burning” my shadow into the wall of the cave. I then ran through the rest of the image, painting light onto the walls as I went and being careful not to let the light fall onto the area where I burned my shadow into the image.
Discovery while taking this image: cave ceilings may be closer than they appear in peripheral vision. WATCH OUT!”
More Tips For Photographing Caves From Good Earth Graphics